Are you a manicure maniac? Love to DIY? It’s time to roll up your sleeves and get your hands dirty…I mean clean and pretty with a DIY manicure. Brew a cup of tea, turn on the music and treat yourself to a relaxing, salon-quality experience right at home! Because let’s face it, nothing beats the joy of you spoiling yourself in the comfort of your own couch.
 Before we start, here are the items you’ll need:
- Polish remover
- Nail Clippers
- Double sized nail file (one side coarse/one side fine)
- Cuticle Softener
- Cuticle Remover
- Cuticle Pusher
- Cuticle Oil
- Non-greasy hand cream
- Base coat
- Top coat
- Nail lacquer of your choice
- Finger bowl
- Nail buffer
- Hot towel
Now let’s get down to business!
Step 1 – Prep your nails
 Strip away your old polish with The Stripper by Deborah Lippmann. This popular polish remover is loaded with natural moisturizing ingredients like aloe to prevent your nails and cuticles from drying out, and the best part of it all? The heavenly lavender scent of course! Trim your nails with a nail clipper to desired length and file them to form either a round or almond shape.
Step 2 – Soften Cuticles
Overgrown cuticles are not only unsightly, they can hinder proper nail growth. Fill the finger bowl with warm water and soak your nails in the bowl. After removing your fingers from the bowl, spread Burt’s Bee Lemon Butter Cuticle Cream at the base of your nails. At a price of $4.99, this yummy cream will leave your cuticles—and hands—soft without putting a dent in your wallet. For even tougher cuticles, try Sally Hansen Instant Cuticle Remover. It’s inexpensive, easy-to-use, and effective. What’s not to love? Rated 4.2 stars out of a maximum of 5 on Makeupalley.com, I say give it a 6!
After applying cuticle softener to the base of your nails, use a cuticle pusher tool of your choice (it could be an orangewood stick or a metal tool and gently push back on the cuticles).
Step 3 – Clean Nails
Gently clean beneath your nails as the skin beneath the nails can be sensitive and finish by quickly rinsing your nails under luke-warm water. Remember, don’t over-soak your nails because long periods of hand-washing can weaken nail structure and lead to brittleness.
Step 4 – Buff Nails
Buffing the nails will create a smooth surface, which will help the nail lacquer adhere to your nails. Once your nails have been buffed, apply a cuticle oil to the base of your nails and allow them to soak for a few minutes. On a tight budget? Instead of investing your money in overpriced products, try using organic extra virgin coconut oil. Not only is this natural moisturizer edible, it also boasts weight-loss benefits. This gives a whole new meaning to “finger licking good.â€
 Step 5 – Massage Hands
Next, gently tap your nails against a flat, hard surface for a minute to increase blood circulation to them; doing so will boost nail growth and produce stronger nails. Then, massage your hands with a non-greasy hand moisturizer of your choice. My pick would be L’Occitane Shea Butter Hand Cream. A perfect balance of shea butter, honey and sweet almond extract infused with the light and alluring aromas of jasmine and ylang-ylang essences, this non-greasy hand cream goes on like a velvety glove. Finally, remove excess oil with a hot towel.
Step 6 – Paint Nails
A common complaint among nail painting lovers is that some of the polish will inevitably end up on the skin around the nails. The solution is simple: spread a thin layer of Vaseline on the areas around the nail bed before application and it’ll prevent the polish from staining your skin. Wipe away the Vaseline at the end for a mess-free application.
 Apply a base coat before applying the lacquer of your choice and your manicure will last much longer. A hot lacquer shade for this fall is “Waking Up In Vegas†by Deborah Lippmann, and you know where you can get it—that’s right, at The Salon Beauty Bar! We just got in the lacquer this week. Come in for a Lady Gaga nail treatment. Wait until it completely dries and finish with a layer of top coat. Voila, you’re done!
Wasn’t that fun? A DIY manicure is a great way to blast away stress and it’s an affordable little guilty pleasure that you can have as often as you like!
Written by Angela Tang
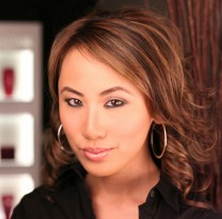
Angela, is the owner of THE Salon Beauty Bar Vancouver. Her salon provides pedicure, manicure, waxing, hair removal, hair salon, skin facial, and makeup services. This blog is designed to share her knowledge through makeup how to’s, video tutorials, skin care tips, fashion trends and much more!
Connect with Angela Tang on Google+